Make Your Hugo Multisite Workflow Fast Like A Boss

I used to write several blogs using Hugo and hosted them on GitHub Pages. But managing many Hugo installations became frustrating, especially when I had to make the same changes on all the websites. My previous workflow was highly inefficient and got compounded by the fact that all my websites used the same theme, and any updates to those themes or configurations needed to be copied to multiple websites.
TL;DR
While searching for ways to manage multiple websites through Hugo, I came across this discussion. The instructions in the answer were pretty clear, and I added my own approach by using Git submodules so I could continue to use Github Pages to host my websites.
I scripted these steps for anyone to use at hugo-multisite-manager.
You can use this solution directly or continue reading below if you would like to go through the details.
Details
To save time, I have scripted all the steps below with instructions and open-sourced it at hugo-multisite-manager but if you like to tinker, read on. 😃
One thing to note is that Github Pages require one website per repository. So, any multi-website setup needs to work with multiple Github repositories.
We will first create a base setup of Hugo to host all our websites.
1. Setting up the base installation
Create a new base Hugo website that will act as a container for your other websites. You can follow Hugo’s Getting Started guide for this. We will also use this base installation to host the themes that your websites can reuse.
Inside this base project, add a new folder called "websites". This folder will hold each individual blog.
2. Add your blogs to the websites folder
- If you do not use Git or Github Pages to host your website
- Create a child folder under "websites" for each blog you would like to host,
- If you use Git, we can use Git submodules to clone your individual websites into this setup:
git submodule add -b main <path-to-git-repo.git> "<path>/websites/<website-name>"
git submodule update --init "<path>/websites/<website-name>"
At this point, your folder structure should start to come together.
3. Setting Up Individual Websites
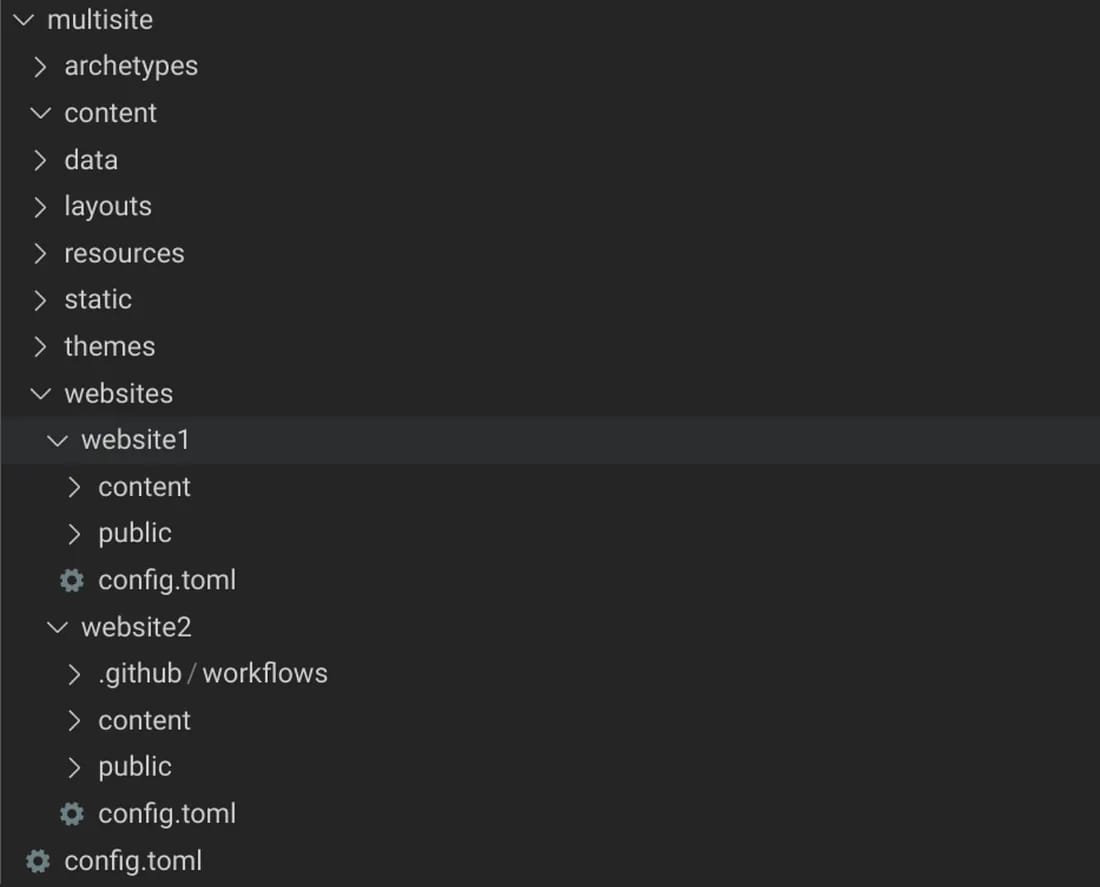
Remove the folders from the submodule that you do not need. Since all my websites use the same theme (hosted by base Hugo installation), I kept only thecontent, public & config.toml files.
Here is a snapshot of how my setup looks after this step:
4. Update Configs
Each website still needs to provide its own config.toml because of website specific settings like its theme parameters etc. However, with this custom setup, we need to update their configurations to point to the new content & publish directories.
In your config.toml add:
...
contentDir = 'websites/<website-name>/content'
publishDir = 'websites/<website-name>/public'
...
That’s it!
Running Your Blogs
Now you can run hugo by providing it the path to specific config.toml.
To run a blog locally:
hugo server --config=websites/<website-name>/config.tomlAdditionally, running hugo --config=websites/<website-name>/config.toml will compile the website into the correct publish directory.
If you are using submodules, you can now commit and push these changes to the respective repositories. If you have the right github workflow or automations already setup, those will now deploy the public folder.
If you are not using git, you can now deploy the public folder like you normally would!